
Spring Batch에서 PostgreSQL Upsert 처리하기
기존 프로젝트에서는 Spring Batch의 Chunk 방식을 사용하여 데이터를 처리해왔으나, 새로운 요구사항에 따라 데이터가 이미 존재할 때는 업데이트하고, 존재하지 않을 때는 삽입하는 Upsert 작업이 필요해졌습니다. Chunk 방식은 주로 대용량 데이터를 처리하고 데이터 변환이 필요한 경우에 적합하지만, 특정 로직(Upsert)에 맞춰 단일 작업을 수행하는 데는 Tasklet 방식이 더 유리하기 때문에 Tasklet 방식으로 전환하여 Upsert를 구현하게 되었습니다.
Upsert 란?
데이터베이스에 존재하지 않는 경우 삽입하고, 존재하는 경우 업데이트하는 방식입니다.
기존 Chunk 방식
    @JobScope
    @Bean
    public Step tabCurrStep() throws Exception {

        return new StepBuilder("tabCurrStep", jobRepository)
                .<CatalogTabHist, CatalogTabCurr>chunk(CHUNK_SIZE, transactionManager)
                .reader(tabCurrReader(null, null))
                .processor(catalogTabCurrProcessor())
                .writer(catalogJpaWriter())
                .taskExecutor(taskExecutor())
                .build();
}기존의 구성된 Chunk 방식은 다음과 같은 구조로 이루어져 있습니다.
- Reader: 데이터를 읽어오는 역할
- Processor: 데이터를 가공하는 역할
- Writer: 데이터를 저장하는 역할
이 방식은 데이터 처리량이 많고, 처리 과정에서 데이터 변환이 필요한 경우에 매우 유용합니다.
Postgres Upsert
Postgres 15버전 이상은 merge 문을 이용해서 구현하면 되는데 현재 프로젝트에 사용중인 버전은 15버전보다 낮아서 Insert ~ on conflict 문을 사용했습니다.
아래는 PostgreSQL 의 Merge와 Insert ~ on conflict에 대해 간략하게 정리했습니다.
PostgreSQL의 MERGE 문
PostgreSQL 15부터 MERGE 문이 도입되었는데, MERGE 문은 조건에 따라 데이터베이스의 테이블을 업데이트, 삽입 또는 삭제할 수 있는 문법입니다. 주로 "upsert" 작업(존재하지 않으면 삽입하고, 존재하면 업데이트)에서 사용됩니다. MERGE 문은 다양한 조건에 따라 복잡한 로직을 구현할 수 있습니다.
MERGE 문 기본 구문 검색 결과를 기반으로 다른 테이블에 INSERT
MERGE INTO target_table USING source_table
ON target_table.key = source_table.key
WHEN MATCHED THEN
    UPDATE SET target_table.column1 = source_table.column1
WHEN NOT MATCHED THEN
INSERT (column1, column2) VALUES (source_table.column1, source_table.column2);두 개의 테이블이 있다고 가정했는데, source_table에서 특정 조건을 만족하는 데이터를 검색하고, 그 결과를 target_table에 삽입합니다.
PostgreSQL의 INSERT ~ ON CONFLICT 문
PostgreSQL의 INSERT ... ON CONFLICT 문은 데이터베이스에 데이터를 삽입할 때, 특정 열에서 충돌이 발생하면 이를 처리할 수 있는 강력한 기능을 제공합니다. 이 문법을 사용하면 데이터를 삽입하거나 업데이트할 수 있습니다.
코드
다음은 source_table에서 데이터를 선택해 target_table에 삽입할 때, id 열에서 충돌이 발생하면 해당 행을 업데이트하는 코드입니다..
-- source_table에서 데이터를 선택하여 target_table에 삽입 또는 업데이트
INSERT INTO target_table (id, name, value)
SELECT id, name, value
FROM source_table
ON CONFLICT (id)
DO UPDATE SET
    name = EXCLUDED.name,
    value = EXCLUDED.value,
updated_at = CURRENT_TIMESTAMP;- INSERT INTO target_table (column1, column2, ...) VALUES (value1, value2, ...): 데이터를 삽입합니다.
- ON CONFLICT (conflict_column): conflict_column 열에서 충돌이 발생할 때 처리할 방법을 지정합니다.
- DO UPDATE SET column1 = EXCLUDED.column1, ...: 충돌이 발생하면, EXCLUDED 테이블의 값을 사용해 지정된 열을 업데이트합니다.
이 문법을 사용하면 중복된 키가 발생할 때, 데이터베이스에 데이터를 삽입하거나 업데이트하는 작업을 효율적으로 처리할 수 있습니다. 이를 통해 데이터 무결성을 유지하면서 성능을 최적화할 수 있습니다.
저는 Upsert 코드를 Spring Data JPA 가 제공하는 Native 쿼리로 작성했습니다.
Upsert 코드 작성
@Modifying(clearAutomatically = true)
@Query(value = """
            INSERT INTO catalog_tab_curr (
                catalog_tab_curr_id,
                        // .. 쿼리생략
            )
            SELECT
                nextval('qbig.CATALOG_TAB_CURR_SEQ'),
                :collectorDate,
                :collectorDate,
                        // .. 쿼리생략
            FROM catalog_tab_hist h
            WHERE
                h.collector_dt = :collectorDate
                AND h.instance_id = :instanceId
            ON CONFLICT (catalog_id)
            DO UPDATE SET
        update_dt = :collectorDate ,
        instance_id = EXCLUDED.instance_id ,
                // .. 쿼리생략
            """, nativeQuery = true)
void currentTableMerge(@Param("collectorDate") LocalDateTime collectorDate, @Param("instanceId") String instanceId);- Native 쿼리에서도 JPA가 제공하는 Named Parameters를 사용할 수 있습니다.
- Named Parameters는 쿼리 문자열 내에서 : 뒤에 파라미터 이름을 명시해서 사용하는 파라미터입니다.
이렇게 하면 쿼리를 더 읽기 쉽게 만들고, 파라미터의 순서와 관계없이 명시적으로 매핑할 수 있습니다. - @Modifying(clearAutomatically = true): 이 애노테이션은 데이터베이스에서 데이터를 수정하는 쿼리를 실행할 때 사용합니다. clearAutomatically = true 속성은 이 메서드가 호출된 후에 영속성 컨텍스트를 자동으로 클리어해줍니다.
- @Query: 이 애노테이션은 쿼리를 정의할 때 사용합니다. nativeQuery = true로 설정해서 네이티브 SQL 쿼리를 사용할 수 있습니다.
Tasklet으로 전환
Tasklet은 Spring Batch에서 단일 작업을 정의하는 구성 요소로, 보다 유연하게 커스텀 로직을 구현할 수 있습니다. Tasklet을 사용하여 upsert를 처리하기 위해 다음과 같은 단계를 따랐습니다.
- Tasklet 구현: 기존 Chunk 단계에서 수행하던 읽기, 처리, 쓰기 로직을 Tasklet 내에 구현했습니다.
- upsert 구현: 데이터베이스에 데이터를 upsert하는 로직을 구현했습니다.
Tasklet 구현
아래는 Tasklet을 사용하여 upsert를 처리하는 코드입니다.
@JobScope
@Bean
public Step tabCurrStepV2(@Value("#{jobParameters[instanceId]}") String instanceId, @Value("#{jobParameters[collectorDate]}") LocalDateTime collectorDate, @Value("#{jobExecutionContext[currentCollectorId]}") Long currentCollectorId) throws Exception {

    return new StepBuilder("tabCurrStep", jobRepository)
            .tasklet((contribution, chunkContext) -> {

                //1 . Processor 에서 처리하던 과정은 여기서 처리
				//...  코드 생략
                // 2. UPSERT 처리
                catalogTabCurrRepository.currentTableMerge(collectorDate,instanceId);

                return RepeatStatus.FINISHED; // TASKLET 정상 종료
            }, transactionManager)
            .build();
}- Job Parameters와 Execution Context: jobParameters는 Spring Batch에서 Job 실행 시 전달된 파라미터를 의미하고, jobExecutionContext는 Job 실행 중에 공유되는 컨텍스트 값을 의미합니다.
- Spring Expression Language (SpEL): @Value 애노테이션 내부에서 #{} 구문을 사용해서 SpEL 표현식을 처리했습니다. 이렇게 하면 Job 파라미터와 ExecutionContext 값을 쉽게 주입받을 수 있습니다.
저는 Tasklet을 따로 분리해서 관리하는것을 선호하기 때문에 람다식으로 작성한 Tasklet을 분리하는 작업을 진행했습니다.
람다식으로 작성한 Tasklet을 분리하는 단계는 총 3단계로 진행합니다.
Tasklet 분리
1. Tasklet의 구현체 클래스 생성
@RequiredArgsConstructor
public class CatalogCurrTasklet implements Tasklet {

    // 생성자 주입 필드 생략

    @Value("#{jobParameters[instanceId]}")
    private String instanceId;

    @Value("#{jobParameters[collectorDate]}")
    private LocalDateTime collectorDate;

    @Value("#{jobExecutionContext[currentCollectorId]}")
    private Long currentCollectorId;

    @Override
    public RepeatStatus execute(StepContribution contribution, ChunkContext chunkContext) throws Exception {
        //1 . Processor 에서 처리하던 과정은 여기서 처리
        //...  생략
        // 2. UPSERT 처리
        catalogTabCurrRepository.currentTableMerge(collectorDate,instanceId);

        return RepeatStatus.FINISHED; // TASKLET 정상 종료
    }
}
2. 작성한 구현체를 스프링 빈으로 등록
@Bean
@StepScope
public Tasklet catalogCurrTasklet() {
    return new CatalogCurrTasklet(
            // 생성자 주입
    );
}
3. 기존에 작성한 Step 코드 수정
    @JobScope
    @Bean
    public Step tabCurrStepV2() throws Exception {

        return new StepBuilder("tabCurrStepV2", jobRepository)
                .tasklet(catalogCurrTasklet(),transactionManager)
                .build();
}이렇게 만든 Tasklet Step을 기존에 사용하던 Chunk Step 자리에 바꿔줬습니다.
항상 코드를 작성했으면 잘 작동하는지 테스트를 해봐야 하는데, 스프링 배치에서 제공해주는 @SpringBatchTest 어노테이션을 테스트 클래스에 작성하면 쉽고 빠르게 테스트를 진행할 수 있습니다.
@SpringBatchTest
@SpringBootTest
class BatchJobTest {
    @Autowired
    private JobLauncherTestUtils jobLauncherTestUtils;

    @DisplayName("Batch Job 테스트")
    @Test
    public void BATCH_JOB_테스트() throws Exception {

        LocalDateTime collectorDate = LocalDateTime.now();

        JobParameters jobParameters = new JobParametersBuilder()
                .addString("instanceId", "00001")
                .addLocalDateTime("collectorDate", collectorDate)
                .toJobParameters();

        JobExecution jobExecution = jobLauncherTestUtils.launchJob(jobParameters);

        //then
        Assertions.assertThat(jobExecution.getStatus()).isEqualTo(BatchStatus.COMPLETED);
    }
}테스트 코드 구성은 Job을 실행할 때 필요한 파라미터값을 전달해 주는 JobParameters와 스프링 배치에서 제공 해주는 JobLauncherTestUtils 를 사용해서 간단하게 구현 했습니다.
JobExecution 객체는 종료된 Job의 다양한 정보를 가지고 있습니다.
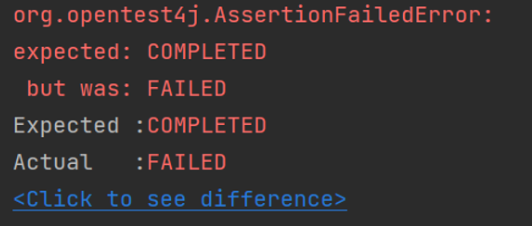
위와 같은 코드를 작성한 후 배치가 정상종료 되지 않았다면 아래와 같은 에러가 발생합니다.
마무리하며
- 기존 Chunk 방식을 Tasklet으로 전환: Chunk 방식에서 Reader, Processor, Writer를 통해 데이터를 처리하는 기존 구조를 유지하면서 Tasklet으로 전환하여 특정 로직을 Tasklet 내에서 처리할 수 있도록 했습니다.
- PostgreSQL의 ON CONFLICT 사용: PostgreSQL 15 이하 버전에서는 MERGE 문을 사용할 수 없기 때문에, Insert ~ ON CONFLICT 문을 사용하여 데이터 충돌 시 업데이트하거나, 충돌이 없을 때는 삽입하는 로직을 구현했습니다.
- Tasklet 분리 및 커스터마이징: Tasklet의 구현체를 작성하고, SpEL 표현식을 사용해 Job 파라미터와 ExecutionContext 값을 주입받아 유연하게 데이터를 처리할 수 있도록 설정했습니다.
- 테스트 코드 작성: Spring Batch에서 제공하는 @SpringBatchTest와 JobLauncherTestUtils를 사용하여 Batch Job 테스트를 자동화하고, Job 실행 결과를 검증하는 테스트 코드를 작성하여 안정성을 확보했습니다.